About publishing with WordPress
Creating a website with WordPress starts with publishing content, whether text, images, audio or videos.
WordPress offers two choices for publishing website content:
- Posts: These typically contain time-sensitive content. Posts can be categorised and tagged.
- Pages: These are mainly for static, dateless content. They don't have categories or tags. 'Contact us' or 'About' pages are good examples of pages.
You create posts and page using a Microsoft Word-style editing screen.
Creating a post
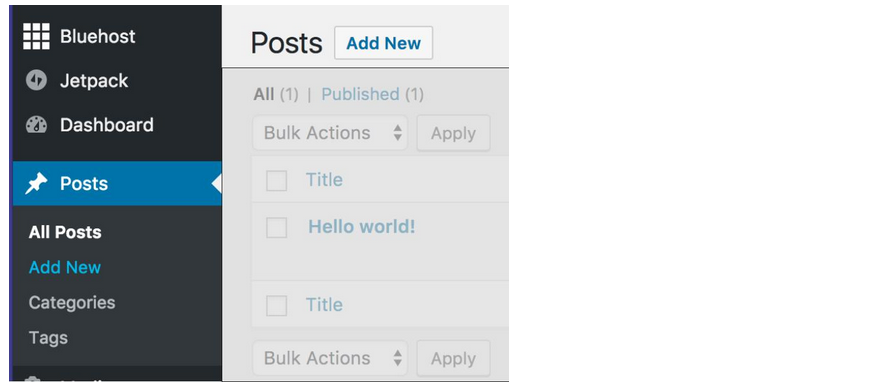
To create a new WordPress post open the Add New section under Posts or choose New -> Post option from the top toolbar.
The first thing you should do is enter a title for your post.
Secondly, enter the actual content of your post in the editing screen. This allows you to bold, italicize, set alignment, add links, etc. To insert images click Add Media. Once you have selected the image, you can place it where you want in the post.
At the right-hand side of the screen, you can see the so-called meta-boxes. Each box has a particular function.
- Publish. Here you can change the status and visibility of your post, schedule it. By clicking the Publish button your post will go live. If you decide to delete the post, press the Move to Trash button.
- Categories. On this box, you can assign your post to a specific category. You can even create a new one by pressing the + Add New Category button.
- Tags box allows to quickly add new tags.
- Featured Image. Here you can assign a featured image to a post. It will be visible at the very top of the post (image location can be different depending on theme).
Always preview how your page looks by click the Preview button in the Publish box. This will immediately create your post and you can view it live on your website.
Creating a page
To create a new WordPress page, open the Add New section under Pages menu or click New -> Page button at the top toolbar.
Add New page section has the same MS Word-style editor as you use when creating posts. Thus, the process of text input and formatting is the same.
You may also notice that Pages section does not have Tags and Categories meta-boxes. Instead, it has a box called Page Attributes. In this section, you can change the order of your pages and set parent pages. This is useful if you want to have several pages under one parent page.
A with posts, preview how your page looks by click the Preview button in the Publish box. When you are happy with it, click Publish.
You can edit and delete previously published posts and pages.
About Tags
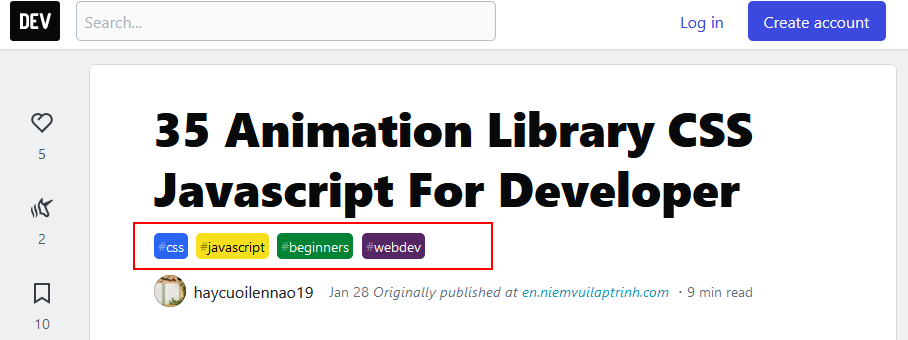
Tags are 'labels' for posts. Tags make navigation of your site easier and allow users to find similar content grouped together.
You can create and edit your tags on the Tags page or you can simply enter them from inside your post editor. This is a quickest and easiest way to create tags.
Once you have added tags to a post, they will appear in the published post. The location of the tags will depend upon the theme you are using.
About Categories
Categories are a way or organsing your WordPress posts. Categories should be a select few (10 or less) broad topics into which all your website content could be sorted. For example, if I had a website about pets, I could use the following categories:
- Cats
- Dogs
- Fish
- Rodents
- Reptiles
Then when I publish a post, I can choose which type of pet the post is about. Every post should belong to one or two categories, never more. Choosing a category is required for all posts, so be sure to pick categories into which every post could be sorted. You can even create a hierarchical, parent-child relationship with categories. For instance, I could have "Short-haired cats" as a subcategory of "Cats."
It is best practice to capitalize your categories due to the structural data they supply to search engines.
First, let's take a look at the Categories page in WordPress. To get to this page, hover over Posts in the left main menu and then click Categories.
To create a new category, begin by entering the name. This is something that you choose, such as news, articles, or anything else that is applicable to your site. The Slug is just the version that will appear in the URL. This needs to be unique.
When you create Categories, you can also create Parent and Child categories. This is another way to organize your posts. You can choose whether the category you are creating is a sub-category.
You can also create a description of your category, which is optional.
Last, you just need to click Add New Category.
As soon as your Category is created, it will appear on the right in your category list.
Now, you need to know how to assign posts to a certain category. Go to one of your posts and open it up so you can edit it.
On the right sidebar, there is a section for your Categories. All Categories that you have created will appear here. To assign your post to a category, simply select the checkbox next to each category that applies to this post.
You can also create Categories from right inside your posts. In that same Categories section box, just click Add New Category. Enter the name, choose a parent category (remember, this is optional), and click Add New Category.
Now you know how to create Categories and assign posts to those Categories. You can also add Categories to your custom menu as pages.