Update a basic email contact form, styled with Bootstrap, to use the online form procesing service from Formspree.
You can view the sample web page you will update in this Tutorial by clicking the image or text link below. The finished sample will open in a new tab of your web browser.
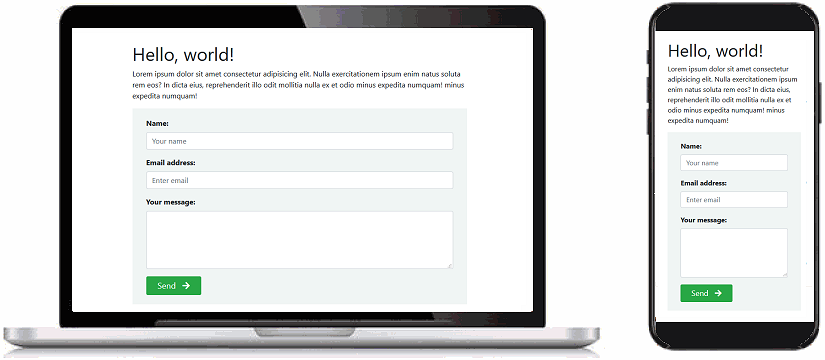
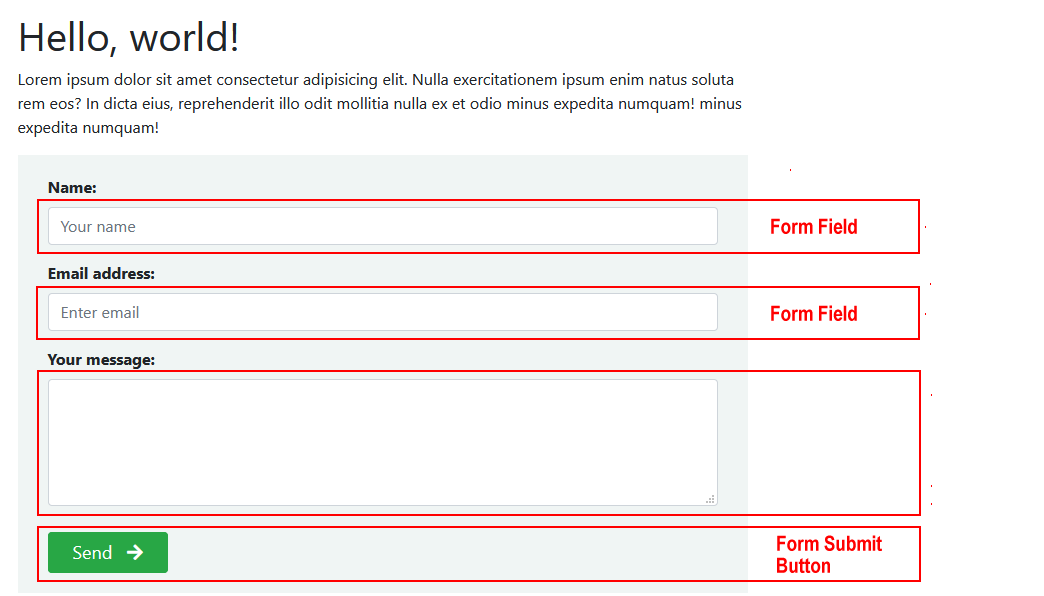
What are called forms in HTML enable users to submit information to websites for processing. A typical example of a form is shown below.
It includes three entry areas or form fields into which a user can input information: Your Name, Your Email and Your Message. At the bottom of the form is a submit button named Send. When clicked or tapped, this button submits the information entered in the form fields to the website.
Your web hosting account on GitHub cannot run the type of server-side program that is needed to process information entered by users into HTML forms. As a result, you need to use an external online service to collect the information entered to an HTML form by users of your website.
Two such popular email-processing services that offer a free tier are the following:
In this exercise, you will work with the following web page and stylesheet:
bootstrap-form.html: Click this link to open the web page in a new tab of your web browser.
Right-click anywhere in the web page and choose View Page Source from the context menu displayed.
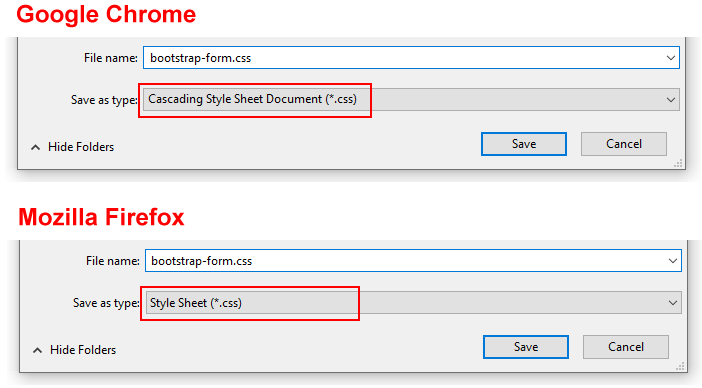
Next, right-click anywhere on the web page source and choose Save as... (Chrome) or Save Page As... (Firefox) from the context menu displayed.
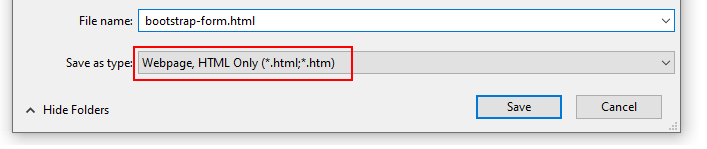
Save the web page in the bootstrap sub-folder of your websites folder with the name bootstrap-form.html
Ensure the Save as type: dropdown list is set to Webpage, HTML only (*.HTML, *.htm).
You can close the browser tab containing the bootstrap-form.html web page.
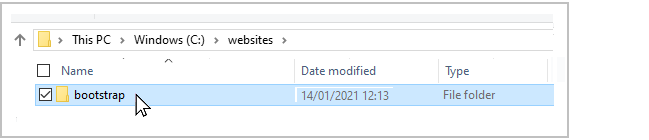
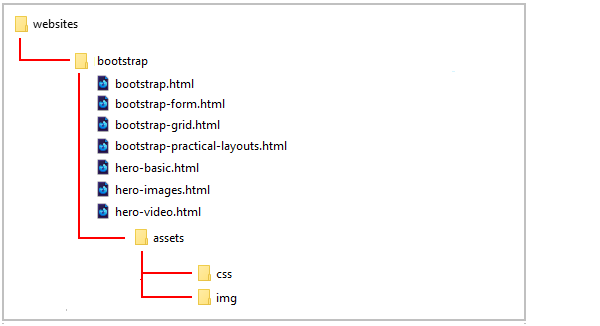
Your websites/bootstrap sub-folder shown now look as shown below.
bootstrap-form.css: Click this link to open the stylesheet file in a new tab of your web browser.
Right-click anywhere in the browser window, and from the context menu, choose Save as... (Chrome) or Save Page As... (Firefox).
Save the bootstap-form.css stylesheet file to your websites/bootstrap/assets/css sub-folder.
Ensure the Save as type: dropdown list is set to the correct file type.
You can close the browser tab containing the bootstrap-form.css stylesheet.
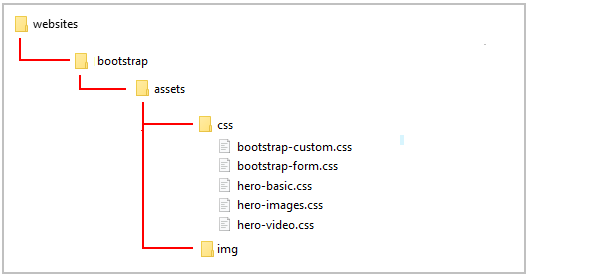
Your websites/bootstrap/assets/css sub-folder shown now look as shown below.
You have now saved the two files you need for this exercise.
There are no sample images to download for this Tutorial.
Registering with Formspree
For your website to use Formspree, you first need to register with this free online service and receive a unique code for adding to your HTML form.
Here are the steps:
In your web browser, visit the formspree.io website.
At the top-right of the home page, click the Get Started button.
On the ‘Register for Formspree’ screen now displayed, enter the Email address you want to use with Formspree.
With Formspree, information entered to your website forms will be forwarded to you by email. The free plan available with Formspree gives you the option to use up two email addresses. The email you enter here will become one of those two addresess to which you can choose form-entered information to be forwarded.
Next, choose a Password for your Formspree account, accept the Terms of Service and Privacy Policy, and click the Register button.
That’s it. You are now registered with Formspree. In future, you can sign into Formspree by clicking the Sign In button on the home page, and entering your Email and Password.
Creating a Project and Form in Formspree
In Formspree, a Project is a way of organising different forms – located on the same or different websites – together in a single group. So, before you can create a form, you must first create a Project to store that form. Follow these steps:
Sign in to Formspree, and, on the so-called Dashboard screen, click the + New Project button.
You are now shown a pop-up-window in which you can enter the following details:
Project name: Enter the name you want to give to your project. This is for your own information only. It will not be displayed on the web page of your website that will contain your HTML form.
Project type: Accept the default option of ‘Dashboard Project’.
When finished, click the Create Project button.
You are returned to the Formspree Dashboard screen. Click the + New Form button.
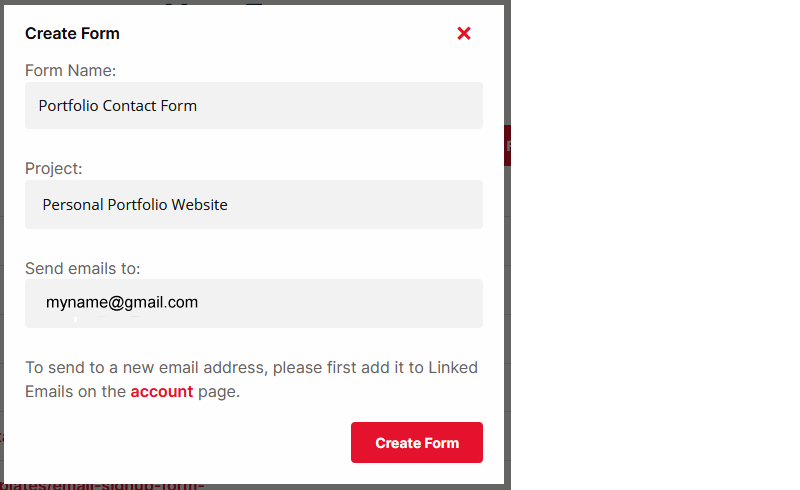
In the pop-up-window displayed, enter the Form Name.
As with the Project Name, the Form Name is for your own information only. It will not be displayed on the web page of your website that will contain your HTML form.
If you have created more than one Project in Formspree, the Project option becomes a drop-down list from which you can select the Project in which you want your new form to be grouped.
When finished, click the Create Form button.
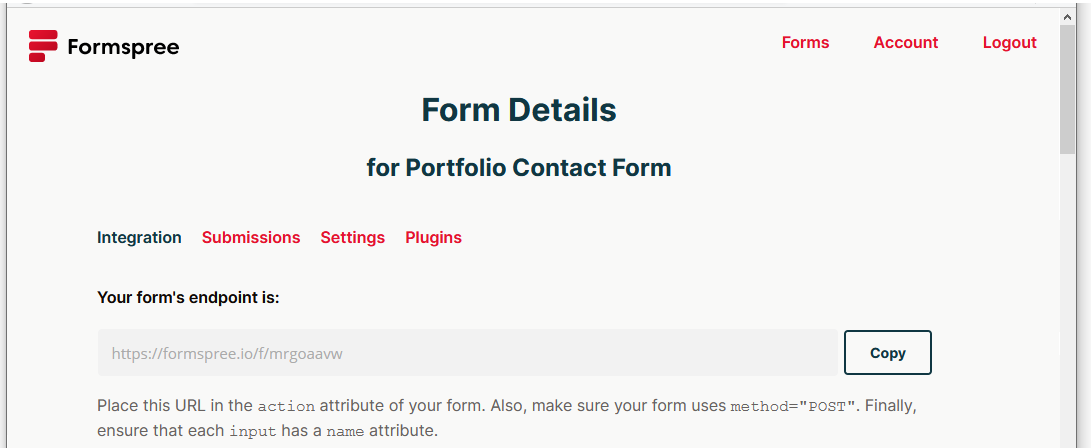
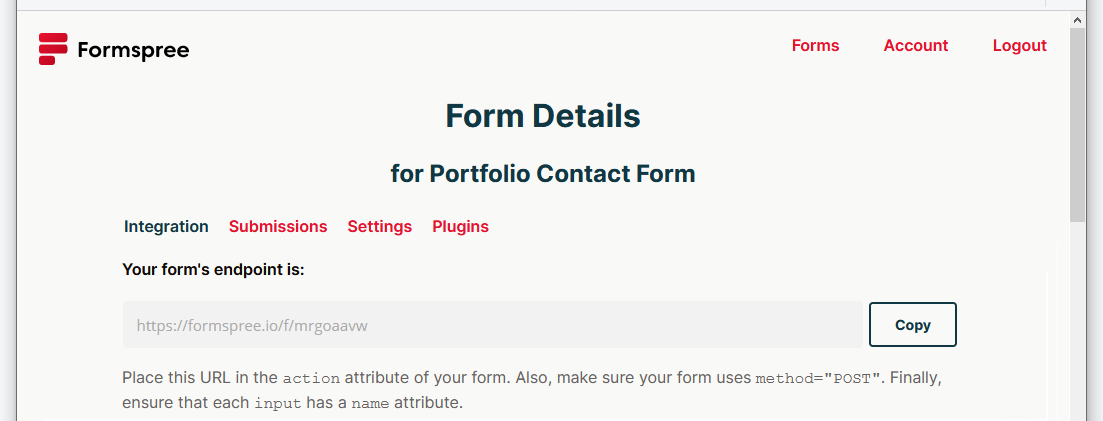
You are now shown the ‘Form Details’ screen. You can see an example below.
It displays the so-called endpoint – the value you will enter in the action attribute of the form you want to create in a web page or pages of your website.
In Formspree, if you click the Forms option near the top-right of the screen you will be returned to the ‘Forms’ screen where you can see your new form listed along with any others you have may have created.
You do not need to create more than one form endpoint for the various forms you will create on your personal portfolio website. You can simply re-use the same endpoint on every form.
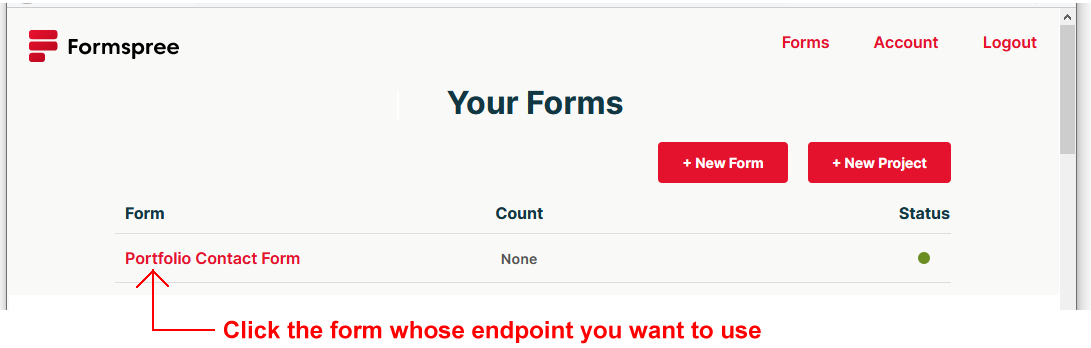
In future, when you want to access your endpoint details from to use in your forms:
Sign in to your account on Formspree.
On the ‘Your Forms’ screen, click the name of the form whose endpoint code you want to use.
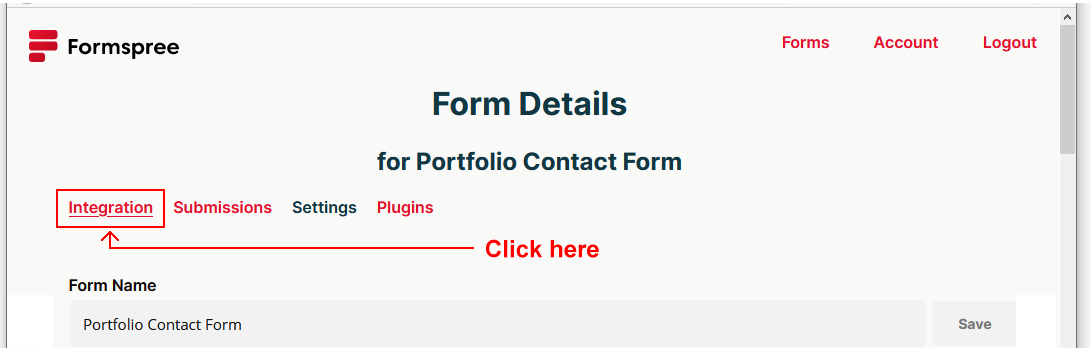
On the ‘Forms Details’ screen now displayed, click the Integration tab.
You can now view the endpoint you need to copy-and-paste into any forms on the web pages of your website.
Updating the endpoint of your form
Your final step is to update your template form with the endpoint code you received from the Formspree website.
In VS Code, display the bootstrap-form.html web page.
Update the form's action value by copying-and-pasting the endpoint value from Formspree. See the example shown below.
Save your bootstrap-form.html file.
That’s it. You have now completed this Tutorial.
And you now have a functional email contact form ready to use on your website.
Uploading your Bootstrap folder to GitHub
Follow these steps below to upload your entire Bootstrap folder to your website on GitHub.
Open a new tab in your web browser and go to GitHub.com. If you are not already signed in to your GitHub account, sign in now.
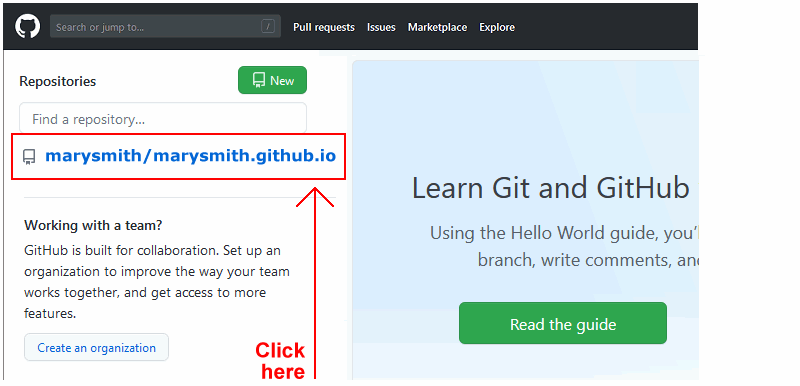
On your GitHub home page, click the name of the repository (‘repo’) that holds your web pages. Its name will look as follows, where username is your chosen username on GitHub.
username.github.io
On the next GitHub screen displayed, click the Add file button near the right of the screen and choose Upload files from the dropdown list.
In File/Windows Explorer, select your bootstrap folder, and drag-and-drop it to your repository on GitHub.
Scroll down to the bottom of the GitHub screen, and accept or edit the short message (Add files via upload) in the Commit changes box.
Finally, click the green Commit changes button to upload your entire bootstrap folder and all the files it contains.
Your uploaded web page is published on GitHub at a web address similar to the following, where username is the username you have chosen for your GitHub account:
 bootstrap-form.html
 You can close the browser tab containing the bootstrap-form.html web page.
 You can close the browser tab containing the bootstrap-form.css stylesheet.
 At the top-right of the home page, click the Get Started button.
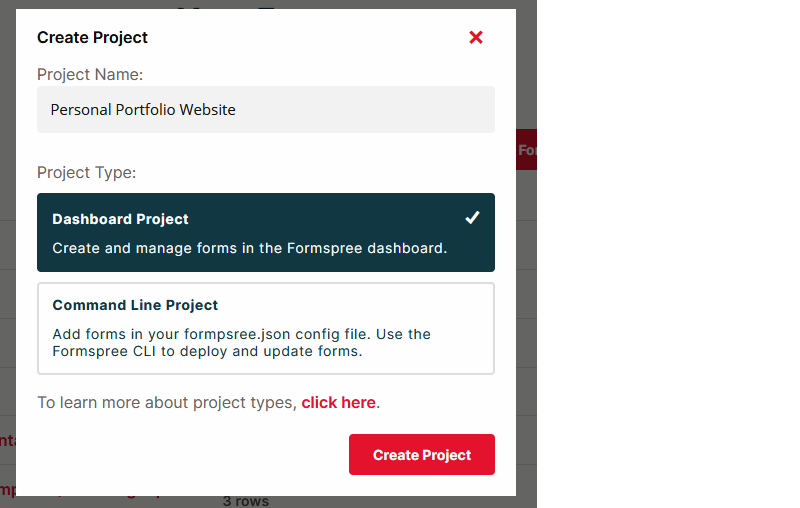
 As with the Project Name, the Form Name is for your own information only. It will not be displayed on the web page of your website that will contain your HTML form.
 It displays the so-called endpoint – the value you will enter in the action attribute of the form you want to create in a web page or pages of your website.