Style the layout and appearance of five hero sections in a sample web page.
Animate text headlines so that they slide in from the top or left of a sample web page.
Add Font Awesome icons to a web.
You can view a finished version of the sample web page you will be working with in this Tutorial by clicking the image or text link below. The finished sample will open in a new tab of your web browser.
Research has shown that a typical web user will form an opinion about a web page in just 50 milliseconds after the page loads on their screen.
If users like what they see, they will continue to read the page – and maybe purchase a product or service.
If they don't like what they see, they will exit the web page and go to another. And your website will have lost a potential customer.
So-called hero blocks (sometimes known as jumbotrons) are large and typically rectangular areas at the very top of a web page. They are the first item seen by users, and are intended to capture their attention and engage their interest in the web page.
Because the fill most of the top of the user's screen, hero blocks are often referred to as displaying above the fold. This term comes from the era when newspapers were printed on large sheets of paper. And, when placed in shops, they were folded in half so that only the top half of the paper was visible to customers. For this reason, newspapers printed their most attention-grabbing headlines and images above the fold.
On mobile, tablet, laptop and desktop screens, above the fold content is what the users can see without needing to scroll down the web page.
In the next two Tutorials, you will learn how to create hero blocks with background images and background videos. However, not every hero block needs to use images or videos. See the examples below.
In tnis Tutorial, you will work with five examples of basic, text-only hero blocks.
Working with your sample files
In this exercise, you will work with the following two files, a web page and a stylesheet:
hero-basic.html: Click this link to open the web page in a new tab of your web browser.
Right-click anywhere in the web page and choose View Page Source from the context menu displayed.
Next, right-click anywhere on the web page source and choose Save as... (Chrome) or Save Page As... (Firefox) from the context menu displayed.
Save the web page in the bootstrap sub-folder of your websites folder with the name hero-basic.html
Ensure the Save as type: dropdown list is set to Webpage, HTML only (*.HTML, *.htm).
You can close the browser tab containing the hero-basic.html web page.
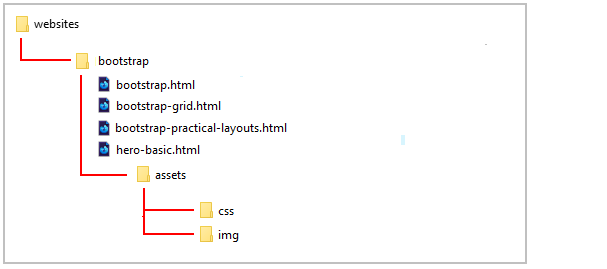
Your websites/bootstrap sub-folder shown now look as shown below.
hero-basic.css: Click this link to open the stylesheet file in a new tab of your web browser.
Right-click anywhere in the browser window, and from the context menu, choose Save as... (Chrome) or Save Page As... (Firefox).
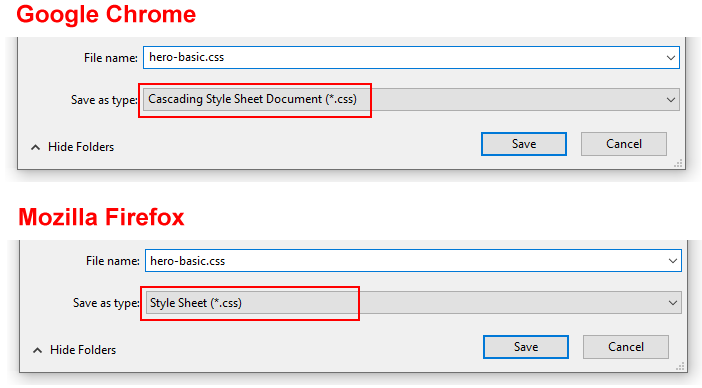
Save the hero-basic.css stylesheet file to your websites/bootstrap/assets/css sub-folder.
Ensure the Save as type: dropdown list is set to the correct file type.
You can close the browser tab containing the hero-basic.css stylesheet.
Your websites/bootstrap/assets/css sub-folder shown now look as shown below.
You have now saved the two files you need for this exercise.
Hero block: sample one
In this section, you will update the styles of the hero-1 block within your sample files.
In VS Code, open the hero-basic.html web page and hero-basic.css stylesheet.
In your browser, display the hero-basic.html web page.
Update the hero-1 background-color
Your first task is to update the background colour of the hero-1 container.
In VS Code, in the hero-basic.css stylesheet, replace the current background-color property and value with the following:
Save the stylesheet and view the effect on the web page in your web browser.
Update the hero-1 font-family
Your second task is to add a Google Font for all the text within the hero-1 container. The Google Font named Open Sans has already been added to the web page and is available to your CSS file.
In VS Code, display the hero-basic.css stylesheet.
Note: The three dots ... simply refer to all the other styles for the CSS selector. Do not type or paste the three dots.
Save the stylesheet and view the effect on the web page in your web browser.
Hero block: sample two
In this section, you will update the styles of the hero-2 block within your sample files. This second hero block has a similar structure to hero-1 block.
Update the hero-2 background-color
Your first task is to update the background colour of the hero-2 container.
In VS Code, in the hero-basic.css stylesheet, replace the current background-color property and value for the hero-2 block with the following:
.hero-2 { background-color: #1f364d; }
Save the stylesheet and view the effect on the web page in your web browser.
Update the hero-2 font-family
Your next task is to add Google Fonts for the text within the hero-2 container. The Google Fonts named Libre Baskerville and Open Sans have already been added to the web page and are available to your CSS file.
In VS Code, display the hero-basic.css stylesheet.
Save the stylesheet and view the effect on the web page in your web browser.
Hero block: sample three
In this section, you will update the styles of the hero-3 block within your sample files.
Update the hero-3 background-color
Your first task is to update the background colour of the hero-3 container.
In VS Code, in the hero-basic.css stylesheet, replace the current background-color property and value for the hero-3 block with the following:
.hero-3 { background-color: #fabbb6; }
Save the stylesheet and view the effect on the web page in your web browser.
Update the hero-3 font-family
Your next task is to add Google Fonts for the text within the hero-3 container. The Google Fonts named Fjalla One and Open Sans have already been added to the web page and are available to your CSS file.
In VS Code, display the hero-basic.css stylesheet.
Save the stylesheet and view the effect on the web page in your web browser.
Hero block: sample four
In this section, you will update the styles of the hero-4 block within your sample files.
Unlike previous hero blocks, the content of this block is left-aligned rather than centre-aligned.
Update the hero-4 background-color
Your first task is to update the background colour of the hero-4 container.
In VS Code, in the hero-basic.css stylesheet, replace the current background-color property and value for the hero-4 block with the following:
.hero-4 { background-color: #3c1c78; }
Save the stylesheet and view the effect on the web page in your web browser.
Update the hero-4 font-family
Your next task is to add Google Fonts for the text within the hero-4 container. The Google Fonts named Roboto Slab and Roboto have already been added to the web page and are available to your CSS file.
In VS Code, display the hero-basic.css stylesheet.
Save the stylesheet and view the effect on the web page in your web browser.
Hero block: sample five
In this section, you will update the styles of the hero-5 block within your sample files.
This hero block has only a main heading but no sub-heading, and is left-aligned.
Update the hero-5 background-color
Your first task is to update the background colour of the hero-5 container.
In VS Code, in the hero-basic.css stylesheet, replace the current background-color property and value for the hero-5 block with the following:
.hero-5 { background-color: #fbf5eb; }
Save the stylesheet and view the effect on the web page in your web browser.
Update the hero-5 font-family
Your next task is to add Google Fonts for the text within the hero-5 container. The Google Font named Libre Baskerville has already been added to the web page and are available to your CSS file.
In VS Code, display the hero-basic.css stylesheet.
Save the stylesheet and view the effect on the web page in your web browser.
Animating text
In your next task you will animate the text headlines for the hero-1 and hero-2 blocks so that they slide in from the top (hero-1) and from the left (hero-2) of the web page.
To generate the CSS code required for the animation effect, you will use the Animista website created by Ana Travas.
You will create the following two new classes in your hero-basic.css stylesheet:
slide-in-top
slide-in-left
You can then apply these classes to elements in your linked hero-basic.html web page.
Creating the slide-in-top CSS class
Follow these steps to create the slide-in-top class in your hero-basic.css stylesheet.
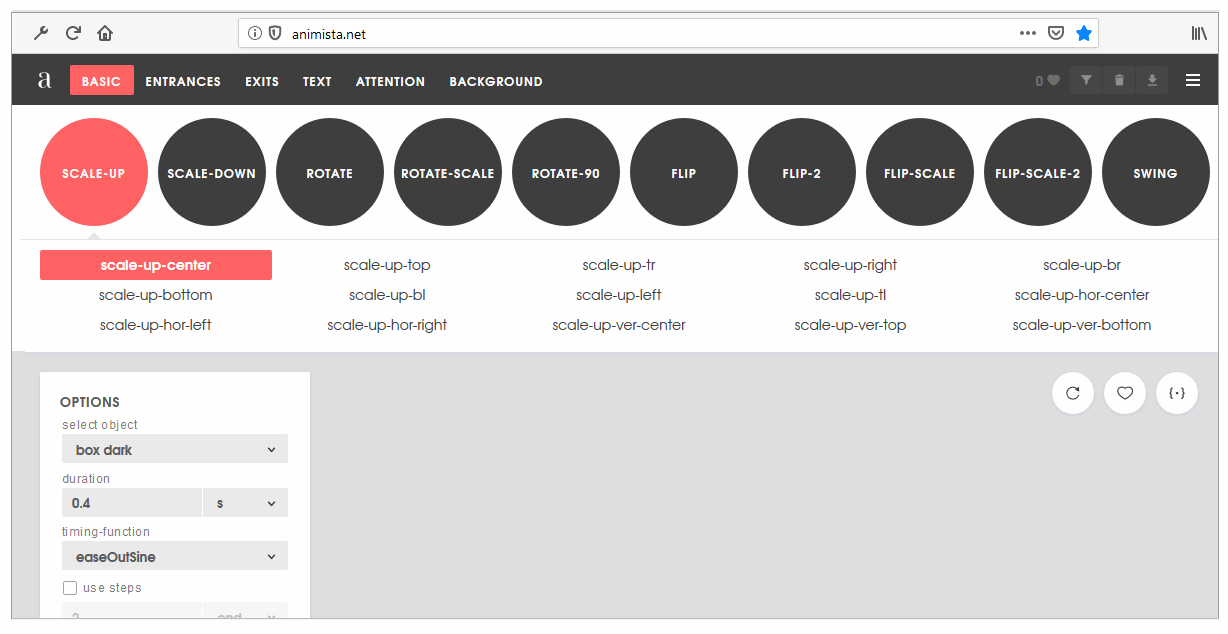
Go to this web page.Animista
and click the Try me button.
Across the top of the screen you can see a navigation menu bar of main options (BASIC, ENTRANCES, EXITS, TEXT ...).
For each of these main options, you can choose from a range of sub-options displayed as white text inside black circles on a draggable sub-menu.
Many of these sub-options also have sub-options of their own.
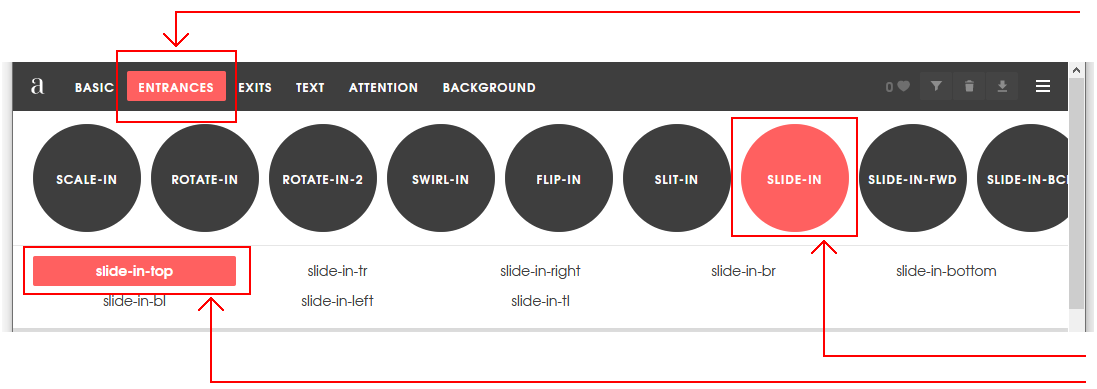
In the main top menu, click the ENTRANCES option. Next, click the red circle containing the SLIDE-IN sub-option. Finally, click sub-sub-option named slide-in-top.
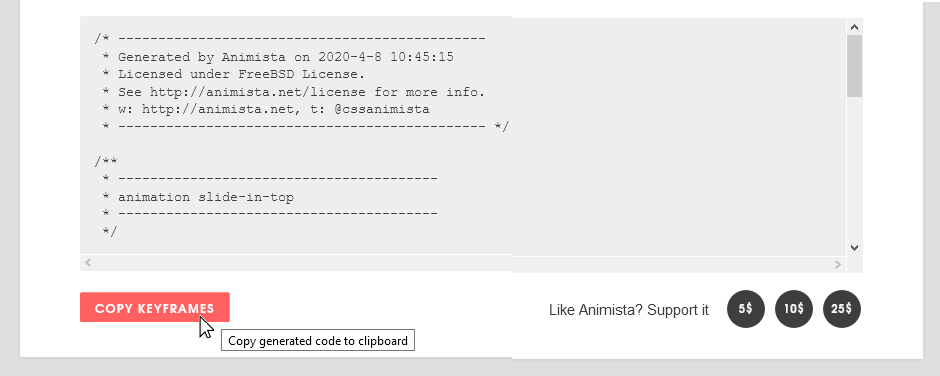
At the right of the screen, click the {*} icon to display the CSS code that Animista has created for you.
With the Autoprefixer option selected, click the Copy Class button.
Paste the code into your hero-basic.css file at the end of your stylesheet.
You have now finished creating the slide-in-top class.
When you apply this class to a heading or element in a web page, you may find that the animated element moves down a little too quickly.
In the hero-basic.css stylesheet, increase the time taken for the sliding animation from 0.5s to 1s as shown below.
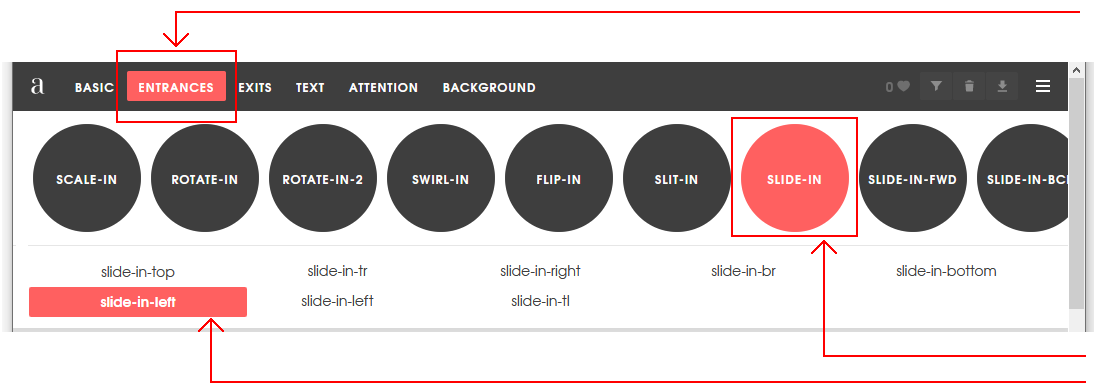
You have now finished creating the slide-in-left class.
Applying the animated text classes
You will now apply the two new animated text classes in your stylesheet to your web page.
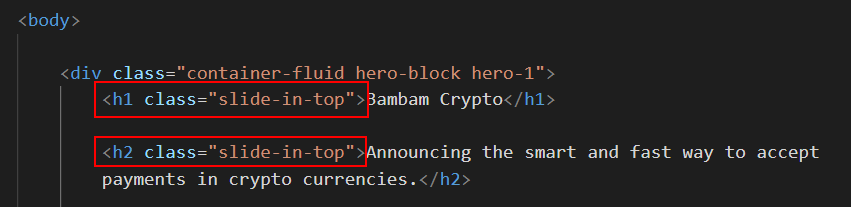
In your hero-basic.html file, add the slide-in-top class to your <h1> heading and <h2> sub-heading within the hero-1 block container as shown below.
Add the slide-in-left class to your <h1> heading and <h2> sub-heading within the hero-2 block container as shown below.
That’s it. You have now successfully updated the exercise file of hero blocks.
Click hero-basic.html to view a finished sample of this web page in a new tab of your web browser.
Adding icons with Font Awesome
In the final part of this Tutorial, you will add some icons from Font Awesome to your button-styled hyperlinks.
In VS Code, display your hero-basic-html file.
In the head section of the web page, just before the closing </head> tag, copy-and-paste the following comment line and code.
<!-- Link to icons for Font Awesome 5 -->
<linkhref="https://cdnjs.cloudflare.com/ajax/libs/font-awesome/5.14.0/css/all.min.css"rel="stylesheet"integrity="sha512-1PKOgIY59xJ8Co8+NE6FZ+LOAZKjy+KY8iq0G4B3CyeY6wYHN3yt9PW0XpSriVlkMXe40PTKnXrLnZ9+fkDaog=="crossorigin="anonymous">
This adds the Font Awesome stylesheet to your web page.
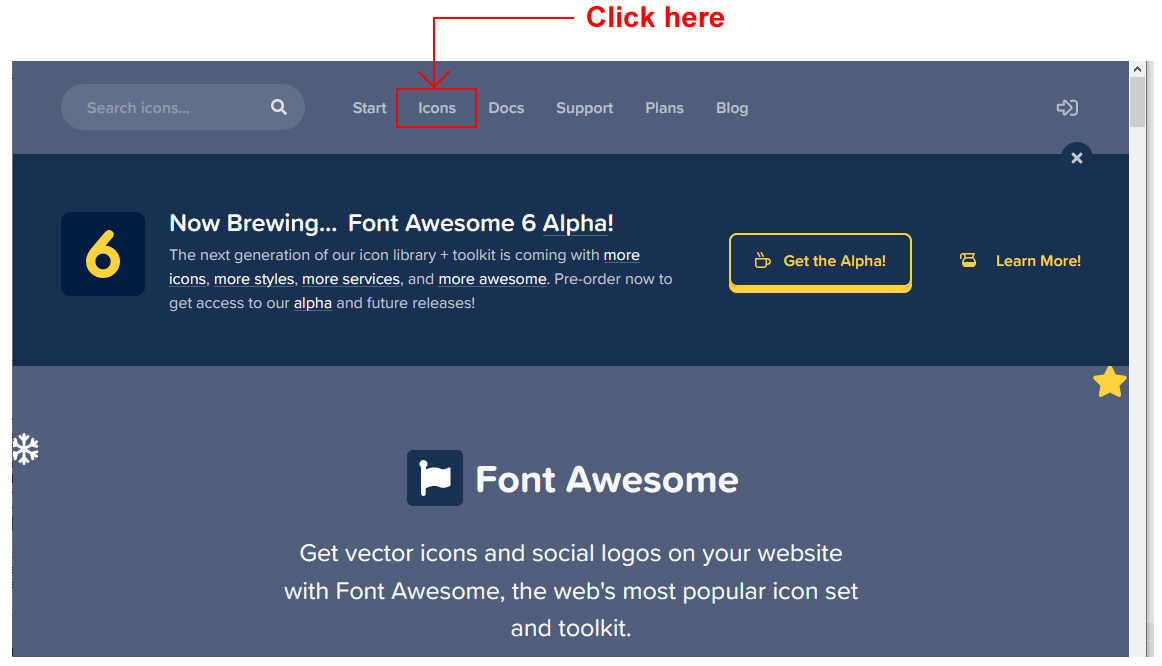
Click the option named Icons in the menu bar across the top of the screen.
On the next page displayed you can use the Search box to locate icons by name from the Font Awesome range of 1535-plus free icons.
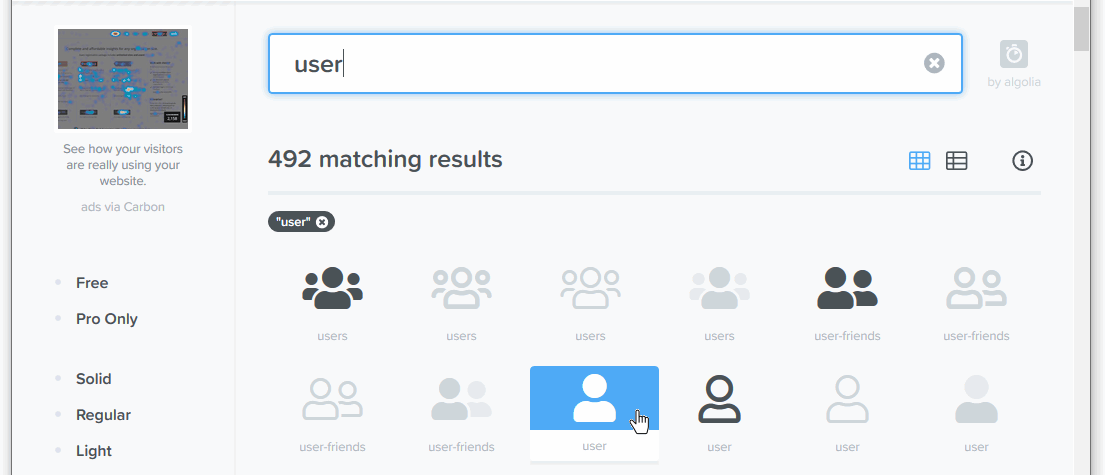
For example in the Search box, enter the word:
user
and click the result displayed below.
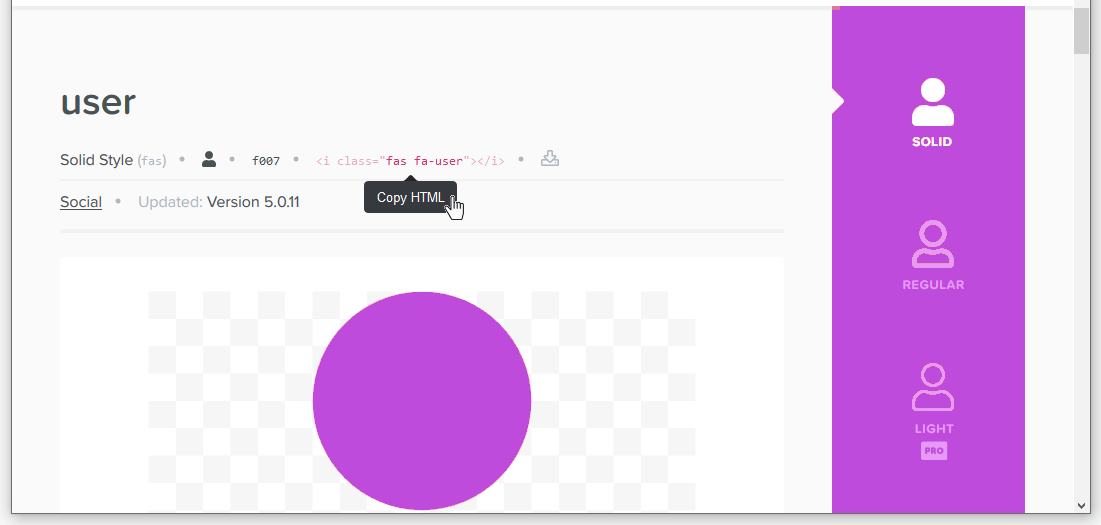
On the next screen displayed, you can see the HTML code to generate the 'user' icon.
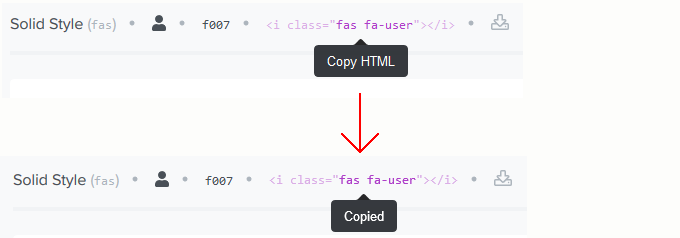
Just click once on the code to copy it.
The HTML icon code will look as follows.
You can now copy-and-paste this or other selected icons to your web pages.
In the next two sections of this Tutorial, you will add Font Awesome icons to the buttons in the first two hero blocks of your sample web page.
Adding icons to the hero-1 block
On the Font Awesome website, select and copy the code for a user icon.
In VS Code, locate the two buttons in the first hero block of your hero-basic.html web page.
In the first of the two buttons, click just after the text Start free.
Press the Spacebar key once, and then type the following 'blank space' character twice.
Now, paste the icon code you copied from the Font Awesome website.
Depending on which icon you selected, the icon code will be different.
Now let's move on to the second of the two buttons.
In the Font Awesome website, select and copy the code for a right-facing arrow icon.
In VS Code, repeat the above steps to paste in the icon code. It should look similar to below.
Again, the font code will depend on which icon you have selected from Font Awesome.
Save and your hero-basic.html web page.
In your web browser, depending on your chosen icons, the two buttons should look similar to those below.
Adding icons to the hero-2 block
In VS Code, locate the two buttons in the second hero block of your hero-basic.html web page.
You can see that the first link is to a portfolio, and the second one is to a contact point.
On the Font Awesome website, select and copy the code for a suitable icon for linking to a portfolio.
In VS Code, let's add your selected icon to before the button text rather than after it.
Click just before the text View My Work.
Press the Spacebar key once, and then type the following 'blank space' character twice.
Now, paste the icon code you copied from the Font Awesome website.
Depending on which icon you selected, the icon code will be different.
Now let's move on to the second of the two buttons.
On the Font Awesome website, select and copy the code for a suitable icon for a point of contact.
In VS Code, repeat the above steps to paste in the icon code. It should look similar to below.
Again, the font code will depend on which icon you have selected from Font Awesome.
Save and your hero-basic.html web page.
In your web browser, depending on your choosen icons, the two buttons should look similar to those below.
That’s it. You have now completed this Tutorial.
You can see an example of the finished web page at the link below.
Follow these steps below to upload your entire Bootstrap folder to your website on GitHub.
Open a new tab in your web browser and go to GitHub.com. If you are not already signed in to your GitHub account, sign in now.
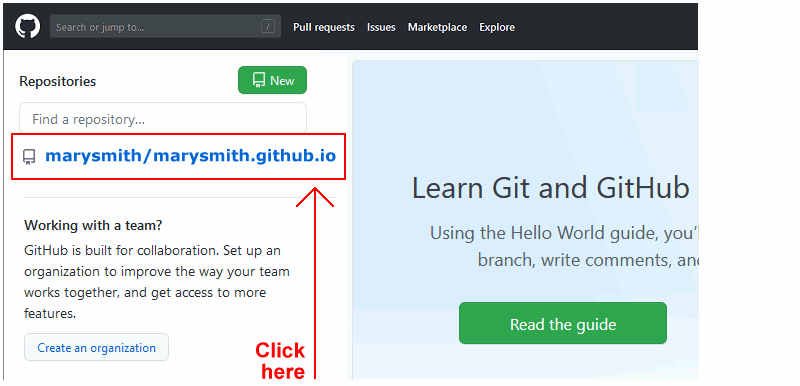
On your GitHub home page, click the name of the repository (‘repo’) that holds your web pages. Its name will look as follows, where username is your chosen username on GitHub.
username.github.io
On the next GitHub screen displayed, click the Add file button near the right of the screen and choose Upload files from the dropdown list.
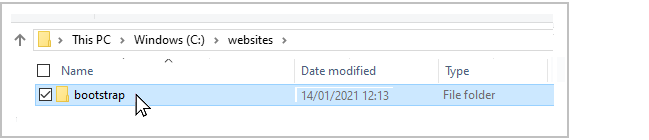
In File/Windows Explorer, select your bootstrap folder, and drag-and-drop it to your repository on GitHub.
Scroll down to the bottom of the GitHub screen, and accept or edit the short message (Add files via upload) in the Commit changes box.
Finally, click the green Commit changes button to upload your entire bootstrap folder and all the files it contains.
Your uploaded web page is published on GitHub at a web address similar to the following, where username is the username you have chosen for your GitHub account:
 hero-basic.html


 You can close the browser tab containing the hero-basic.html web page.


 On the next page displayed you can use the Search box to locate icons by name from the Font Awesome range of 1535-plus free icons.
 Just click once on the code to copy it.
 The HTML icon code will look as follows.